
Contents
Reports display detail records of all EdgelessPBX MT calls, system action logs, CLI messages and SMTP logs
Reports on master tenant
Master tenant has the ability to view reports from all tenants.
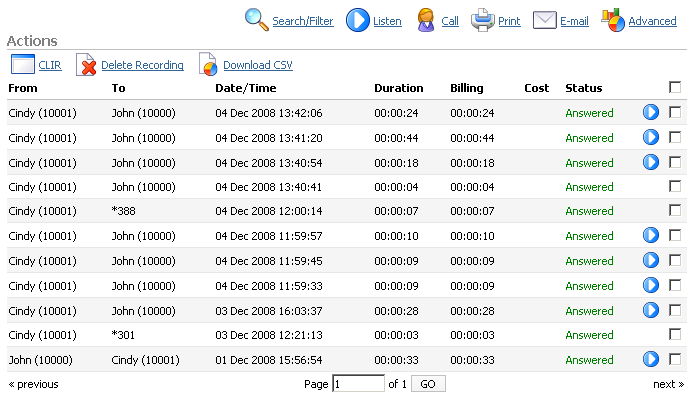
CDR
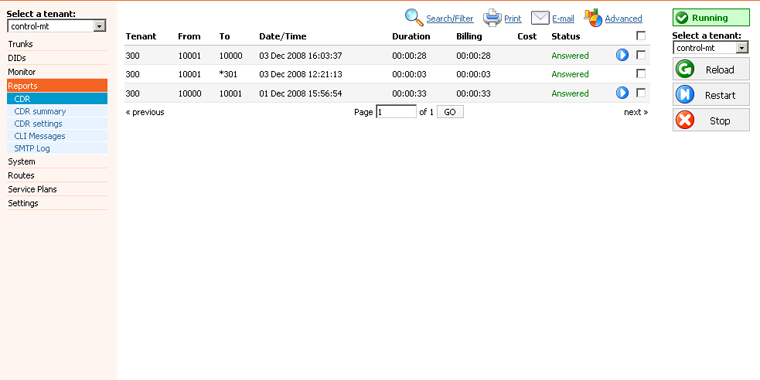
CDR displays detailed records of all EdgelessPBX MT calls with the following details
- Tenant
Tenant on which the call happened.
(ex. If call was made on tenant with prefix 300, 300 will be shown here).
(Display) - From
Extension number from which the call was made
(ex. If call was made from extension 1001 to extension 1004, ‘1001’ is displayed here).
(Display) - To
Extension number to which the call was made
(ex. If call was made from extension 1001 to extension 1004, ‘1004’ is displayed here).
(Display) - Date/Time
Date and Time when the call was made
(ex. 04 Oct 2006 10:44:10)
(Display) - Duration
Call duration time in hh:mm:ss format
(ex. 00:12:45)
(Display) - Billing
Time billed by the system
(ex. 00:12:45)
(Display) - Status
Displays the call status
Example:
Depending on whether a call was answered or not, this field value may have the following content:- Answered
- Not Answered
- Busy
- Error
(Display)
This icon is displayed once a call is recorded and ‘Delete’ or ‘Listen’ enhanced service is active
This is a box used with the CDR commands to select a desired call
Search/Filter

- Start DateSelect a Search /Filter start date
(ex. Click on the small ‘Calendar’ icon next to a field and select the desired date)
(Option button) - End DateSelect a Search/Filter end date
(ex. Click on the small ‘Calendar’ icon next to a field and select desired date)
(Option button) - FromSelect whether you want to search CDRs by Destination(s) or Trunk from where the call got in
(ex. Destination(s) or Trunks)
(Select box) - ToThis field points to the Destination(s) or Trunk for which you are searching
(ex. Trunk)
(Select box) - IDID of the CDR. When the user selects a CDR, the ID field shows that CDR’s ID. If there are problems on the system, the customer can supply support team with a problematic CDR ID which helps in locating it.
(ex. 1221447123.66)
([0-9] .) - TenantsType one or mulTIP:le tenant numbers (comma separated) to filter records from certain tenants only.
(ex. 300)
([0-9]) - Start TimeWhen searching for CDRs, this is the start time in the Start Date
(ex. Time in hh:mm:ss format like 10:15:30)
([0-9] 🙂 - End TimeWhen searching for CDRs, this is the end time in the End Date
(ex. Time in hh:mm:ss format like 15:20:30)
([0-9] 🙂 - FromIf you chose Destination(s) in the From Select box, you will enter an extension from which the call came. If your selection was Trunk, you will have a Select box in this place where you can choose a trunk on the system from which the call came.
Example:- Destination(s) – 1009
- Trunk – Sales
([0-9] or Select box)
- ToHere you will enter number of the destination or select a trunk in which the call ended up.
(ex. 1007)
([0-9]) - Status:Search calls by selecting desired call status
Example:
Click on a ‘Please Select’ button and select one of the available fields:- All
- Answered
- Not Answered
- Busy
- Error
(Select box)
TIP:: After making any changes to search filter, be sure to click the search icon
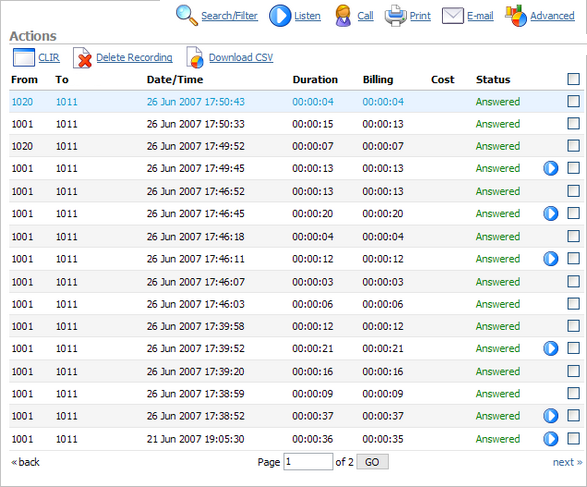
Actions
Listen
Listen:
Once the ‘Listen’ icon is displayed next to a call record it means that the specific call was recorded.
(ex. To play recorded calls, check the box next to a ‘Listen’ icon and click ‘Listen’. Browser will prompt you to open the sound file in your favorite audio player or to download the sound file).
(Option button)

Click on the ‘Email’ button to send all reports listed on the page or select a box next to the report and click on the ‘Email’ button to send only the selected ones

Provide an E-mail address where the report is to be sent and click on the ‘OK’ button to proceed or ‘Cancel’ to abort the email action
Press ‘OK’ to email all CDR records on the current page (even if they are not selected) or click ‘Cancel’ to print selected records only

Finally, press the ‘OK’ button to confirm the email action or ‘Cancel’ to abort the email action
Advanced

CLIR

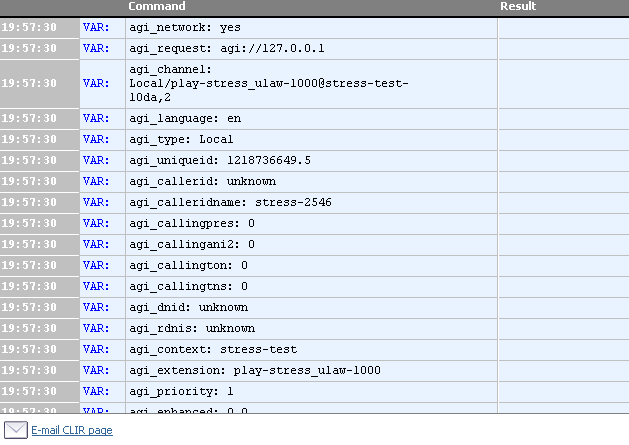
- CLIR:
CLIR (Command Line Interface Record) details
(ex. Select a desired call record and click this button to view more technical details about the call. A small popup window will open with the data.
NOTE: When experiencing any kind of unexplained problems, this is the data you need to send to the technical support team)
(Command Button)
E-mail CLIR page option enables you to send a current CLIR to the desired e-mail address
Delete Recording
Delete Recording:
Deletes the recorded calls.
(ex. Select a recorded call and click this button to delete it from the file system)
(Command Button)
NOTE: For this command to be displayed, appropriate enhanced service has to be set.
Download CSV
Download CSV:
Download data as the .csv (Comma Separated Value) file
(ex. Click this button to download the .csv file to your desktop)
(Command Button)
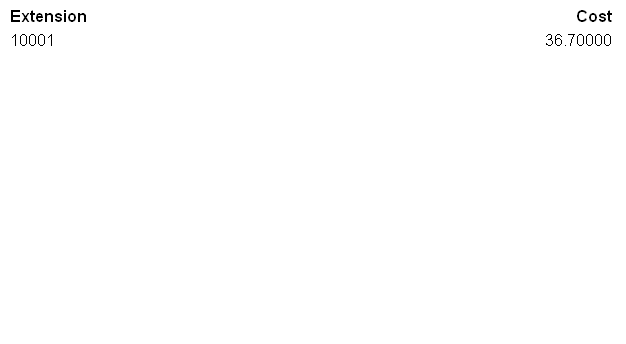
CDR summary
CDR summary is used when one wants to check the total cost of the calls that some extension on the tenant made.
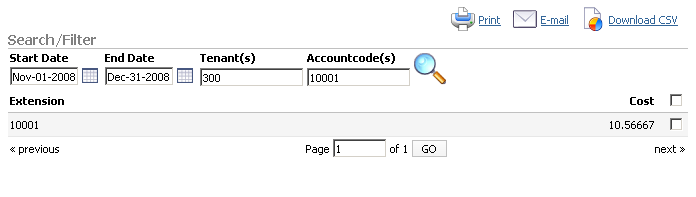
- Extension:Extension for which system is presenting total cost of all calls.
(ex. 10001)
(Display) - Cost:Total cost of extension calls.
(ex. 10.66)
(Display)
Search/Filter

- Start Date:Select a Search/Filter start date
(ex. Click on the small ‘Calendar’ icon next to a field and select the desired date)
(Option button) - End Date:Select a Search/Filter end date
(ex. Click on the small ‘Calendar’ icon next to a field and select the desired date)
(Option button) - Tenant(s):Tenant(s) on which the calls happened.
(ex. 300)
([0-9]) - Acountcode(s):Extension(s) which made calls.
(ex. 10001)
(Display)
TIP:: After making any changes to the search filter, be sure to click the search icon
Check the box next to a call record and click the ‘Print’ button. This action will open a new pop-up window with the printing interface.
Click on the ‘Email’ button to send all cost reports listed on the page or select a box next to a report and click on the ‘Email’ button to send only the selected ones
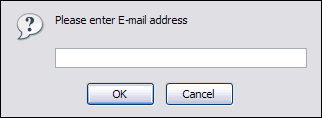
Provide the E-mail address where the report is to be sent and click on the ‘OK’ button to proceed or ‘Cancel’ to abort the email action

Press ‘OK’ to email all reports on the current page (even if they are not selected) or click ‘Cancel’ to print selected records only
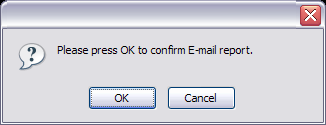
Finally, press the ‘OK’ button to confirm email action or ‘Cancel’ to abort the email action
Download
Download CSV:
Download data as a .csv (Comma Separated Value) file
(ex. Click this button to download the .csv file to your desktop)
(Command Button)
CDR settings
Please provide a number in ‘Records per page’ field
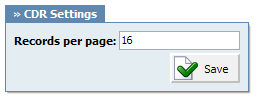
Records per page:
Number of records displayed per page
(ex. When on the ‘Reports: CDR’ page, if this option is set to ’16’, the last 16 call records will be displayed. On the bottom there is a ‘Page’ field. Type a page number, e.g. ‘2’, and click the ‘GO’ button to display the next 16 call records)
([0-9])
CLI Messages
CLI messages provide a convenient method of showing messages received from the asterisk CLI (Command Line Interface). Each message is shown in the order received and if clicked on, will open a new browser searching www.google.com with the message content text.
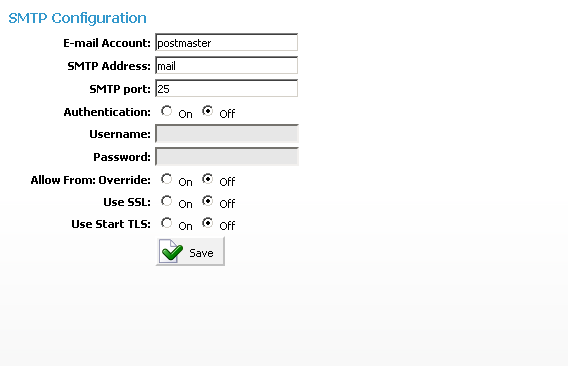
SMTP Log
Last messages archived in the SMTP log. Messages are marked as:
- Sent – Sent by EdgelessPBX MT
- Received – Response from the SMTP server
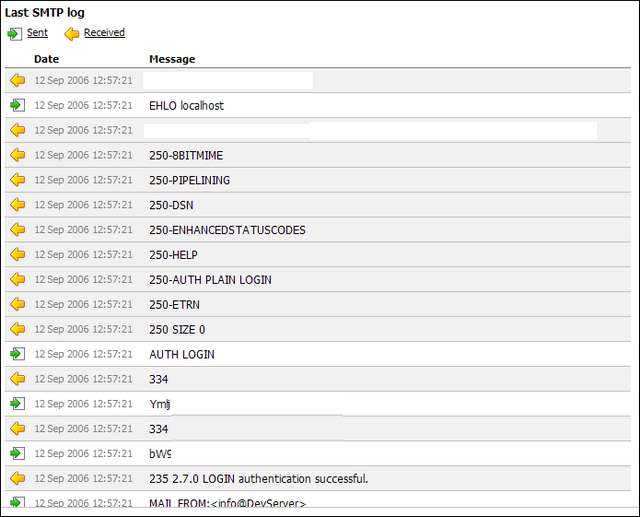
- Date:
Date/Time SMTP log was created
(12 Sep 2006 12:57:21)
(Display) - Message:
SMTP server response
(AUTH LOGIN)
(Display)
Reports on slave tenants
Slave tenants can view CDRs of the calls that were made on them and can’t view the CDRs from the other tenants.
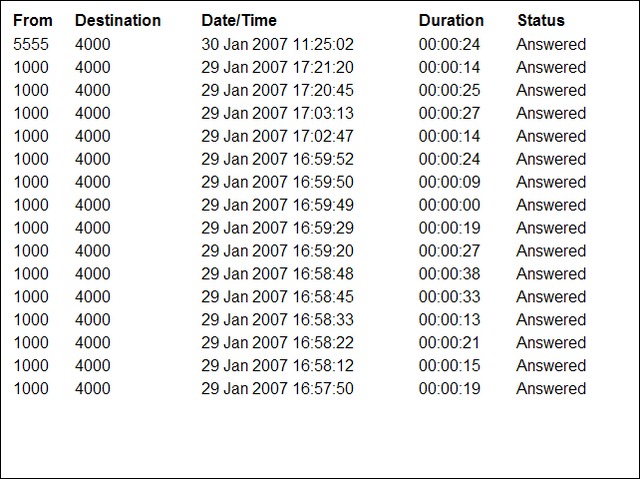
CDR
CDR displays detailed records of all calls on the current tenant with the following details
- From:Extension number from which the call was made
(ex. If the call was made from extension 1001 to extension 1004, ‘1001’ is displayed here).
(Display) - To:Extension number to which the call was made
(ex. If call was made from extension 1001 to extension 1004, ‘1004’ is displayed here).
(Display) - Date/Time:Date and Time when the call was made
(ex. 04 Oct 2006 10:44:10)
(Display) - Duration:Call duration time in hh:mm:ss format
(ex. 00:12:45)
(Display) - Billing:Time billed by the system
(ex. 00:12:45)
(Display) - Status:Displays the call status
Example:
Depending on whether a call was answered or not, this field value may have the following content:- Answered
- Not Answered
- Busy
- Error
(Display)
This icon is displayed once a call is recorded and ‘Delete’ or ‘Listen’ enhanced service is active
This is a box used with the CDR commands to select a desired call
Search/Filter

- Start Date:
Select a Search/Filter start date
(ex. Click on the small ‘Calendar’ icon next to a field and select desired date)
(Option button) - End Date:
Select a Search/Filter end date
(ex. Click on the small ‘Calendar’ icon next to a field and select the desired date)
(Option button) - From:
Select whether you want to search CDRs by Destination(s) or Trunk from where the call got in
(ex. Destination(s) or Trunks)
(Select box) - To:
This field points to a Destination(s) or Trunk for which you are searching
(ex. Trunk)
(Select box) - ID:
ID of the CDR. When a user selects a CDR, the ID field shows that CDRs ID. If there are problems on the system, the customer can supply the support team with the problematic CDR ID which helps in locating it.
(ex. 1221447123.66)
([0-9] .) - Start Time
When searching for CDRs this is the start time on the Start Date
(ex. Time in hh:mm:ss format like 10:15:30)
([0-9] 🙂 - End Time
When searching for CDRs this is the end time on the End Date
(ex. Time in hh:mm:ss format like 15:20:30)
([0-9] 🙂 - From
If you chose Destination(s) in the From Select box, you will enter the extension from which the call came. If your selection was Trunk, you will have a Select box in this place where you can choose a trunk on the system from which the call came.
Example:- Destination(s) – 1009
- Trunk – Sales
([0-9] or Select box)
- To
Here you will enter number of the destination or select a trunk in which the call ended up.
(ex. 1007)
([0-9]) - Status:
Search calls by selecting desired call status
Example:
Click on a ‘Please Select’ button and select one of the available fields:- All
- Answered
- Not Answered
- Busy
- Error
(Select box)
TIP:: After making any changes to search filter, be sure to click the search icon
Listen
Listen:
Once the ‘Listen’ icon is displayed next to a call record it means that the specific call was recorded.
(ex. To play recorded calls, check the box next to a ‘Listen’ icon and click ‘Listen’. Browser will prompt you to open the sound file in your favorite audio player or to download the sound file).
(Option button)
Call

To establish a call between two extensions, all you need to provide is the caller $EXTENSION number and the $DESTINATION extension
- Caller
Extension that will make a call
Example:
Provide any extension number here, 1001, for example
([0-9]) - Destination:
Destination extension that will be dialed by the ‘Caller’ extension
(ex. To select a destination extension, first check the box next to a CDR record. This field will display two extensions listed under ‘From’ and ‘Destination’ selected record)
(Select button)
TIP:: After setting ‘Caller’ and ‘Destination’ extensions, click the call icon
Check the box next to a call record and click the ‘Print’ button. This action will open a new pop-up window with the printing interface.
Click on the ‘Email’ button to send all reports listed on a page or select a box next to a report and click the ‘Email’ button to send only selected ones

Provide an E-mail address where the report is to be sent and click on the ‘OK’ button to proceed or ‘Cancel’ to abort the email action
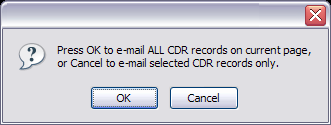
Press ‘OK’ to email all CDR records on the current page (even if they are not selected) or click ‘Cancel’ to print selected records only

Finally, press the ‘OK’ button to confirm an email action or ‘Cancel’ to abort the email action
Advanced

CLIR
- CLIR:
CLIR (Command Line Interface Record) details
Example:
Select a desired call record and click this button to view more technical details about the call. A small popup window will open with the data.
NOTE: When experiencing any kind of unexplained problems, this is the data you need to send to the technical support team
(Command Button)
E-mail CLIR page option enables you to send the current CLIR to desired e-mail address
Delete Recording
Delete Recording:
Deletes the recorded calls. NOTE: For this command to be displayed, appropriate enhanced service has to be set.
(ex. Select a recorded call and click this button to delete it from the file system)
(Command Button)
Download CSV
- Download CSV:
Download data as a .csv (Comma Separated Value) file
(ex. Click this button to download the .csv file to your desktop)
(Command Button)
CDR settings
Please provide a number in the ‘Records per page’ field

Records per page:
Number of records displayed per page
(ex. When on the ‘Reports: CDR’ page, and this option is set to ’16’, the last 16 call records will be displayed. On the bottom there is a ‘Page’ field. Type a page number, e.g. ‘2’, and click the ‘GO’ button to display the next 16 call records)
([0-9])